
Composite hose bend radius is the tightest curve the hose can take before the helix is damaged or the bore closes. The values originate in the type table, and they rise with bore and with wall type. It is the single most useful number on a datasheet after the pressure rating. Most field damage we see on flexible lines is a radius problem rather than a product problem.
This guide gives the published values, explains what happens inside the wall when the limit is exceeded, and sets out how to design a loop that keeps the hose inside its radius for the whole of its working life.

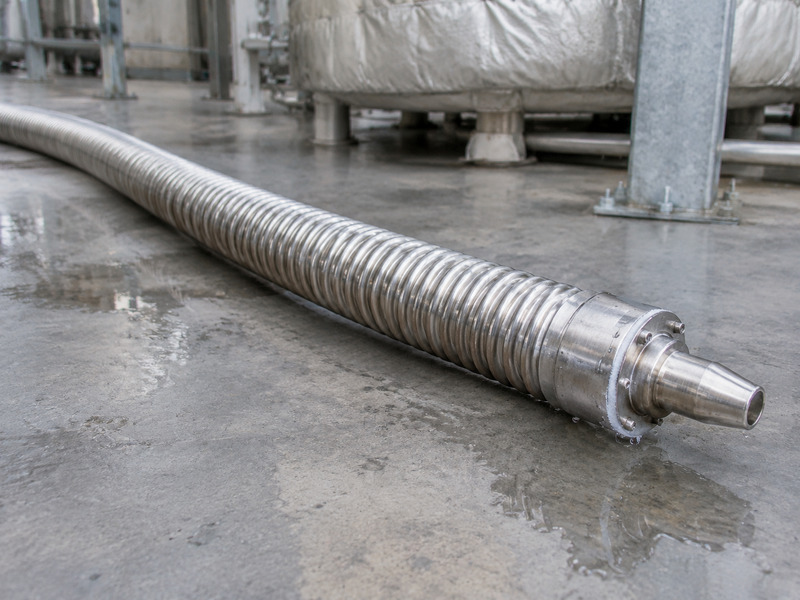
Figure 1. A radius marked on the floor. What looks like a generous curve at 2 inch becomes a tight bend at 6 inch, because the limit scales with bore.
Why Does Bend Radius Matter on a Composite Hose?
A composite hose has a bend limit because the wall is thin and the helix is the only thing holding the bore open.
When the hose curves, the inner side of the wall compresses and the outer side stretches. The film and fabric tolerate that within limits. The wire tolerates it less: the helix deforms, the pitch changes and, if the curve is repeated, the wire work-hardens and cracks.
A curve tighter than the limit produces three progressive effects. The bore ovalises, which reduces flow. The helix takes a permanent set, which leaves a kink after the hose straightens. And the cover wrinkles on the inside of the bend, which is where abrasion and cracking start.
None of those appear as a leak on the day. They appear as a soft spot, a reduced flow and eventually a pinhole at the crease.
What Are the Published Values?
The standard tabulates a minimum radius for each bore and type, and the type matters because a heavier wall needs a larger curve.
| Bore | Types 1 and 2 | Types 3 and 4 |
|---|---|---|
| 25 mm (1 in) | 125 mm | 200 mm |
| 50 mm (2 in) | 200 mm | 225 mm |
| 80 mm (3 in) | 300 mm | 350 mm |
| 100 mm (4 in) | 375 mm | 400 mm |
| 150 mm (6 in) | 550 mm | 600 mm |
| 200 mm (8 in) | 750 mm | 800 mm |
Table 1. Minimum bend radius by bore and type. Values are from the type table; confirm against the build ordered.
Two readings matter. The first is that the radius is measured to the centreline of the hose, as the size chart also assumes, not to the inside of the curve. The second is that the figure is a minimum for occasional movement, not a working radius for a hose that flexes every shift.
For a hose that moves continuously, a larger radius is the practical choice. The published figure describes what the hose survives; it does not describe what it survives indefinitely.
What Happens When You Bend It Tighter?
Four things, in order.
The bore ovalises first, which reduces flow before anything fails. On a suction line that ovalisation can be enough to collapse the hose, because the same curve that narrows the bore also reduces the vacuum resistance.
The helix then takes a set. The wire does not spring back fully, so the hose retains a curve after it is straightened. A hose that will not lie flat has already been bent beyond its limit.
The cover wrinkles on the inside of the bend. Those wrinkles are where water sits, where abrasion concentrates and where cracking begins.
And the film creases at the same point every time. A crease is a fatigue site, and a fatigue site is where the pinhole appears.

Figure 2. Two layouts. The loop takes the movement; the kink takes the damage, and it does so at the fitting where the hose cannot flex.
How Do You Design a Loop?
A hose loop design exists to absorb movement and length, and the support layout is what makes it hold without approaching the radius limit.
Three principles cover most cases. Make the loop vertical rather than horizontal, so it drains rather than trapping. Support the loop at its lowest point so the weight does not pull it tighter. And give the loop enough length that the working radius is comfortably above the minimum.
The loop also protects the ends. A fitting is rigid, so any movement the hose cannot absorb at the loop it will absorb at the ferrule, which is where fatigue failures begin.
Where space is limited, a smaller bore with more length is usually better than a larger bore forced into a tight curve. The smaller hose has a smaller radius, and it fits the space it has.
Where Do Installation Mistakes Happen?
Five recurring errors, and each produces the same result.
Pulling the hose tight between two fixed points, so the only flexibility is at the fittings. Bending at the connection rather than a meter away. Using a support as a guide, so the hose is forced into a curve at the bracket. Storing the hose in a tight coil that sets the helix. And routing around a corner without checking the radius at the corner.
A kinked composite hose is easy to identify: the bore is visibly flattened at the bend and the hose will not straighten under its own weight.
Each error is cheap to correct at installation and expensive to correct after a season of fatigue.
What Loop Shapes Work?
| Loop type | Use | Note |
|---|---|---|
| Vertical U | Fixed connections with movement | Drains, supports easily |
| Horizontal U | Tight spaces | Traps liquid, needs a drain point |
| Expansion loop | Long runs with temperature change | Needs two supports |
| Travelling loop | Moving arm or trolley | Needs a trolley or hanger |
| Free hang | Short drops | Weight pulls it straighter than designed |
Table 2. Loop shapes and what each one demands. The free hang row is where a design quietly becomes a kink.
How Do You Measure a Radius on Site?
Three methods, in increasing accuracy, and the inner wire is what a wrong measurement damages.
Estimate from the floor marking: a radius drawn at the limit and checked against the hose is enough for most installations.
Measure the chord and the sag of the curve, then calculate the radius from them. This works on a hose already installed and takes two people and a tape.
Or check the hose against a template cut to the minimum radius, which is the method most yards use because it needs no arithmetic.
Whichever method is used, measure to the centreline and record the result. A radius check that is not recorded is a conversation, and the next installer will not have it.
What About Moving Arms and Travelling Hoses?
A moving connection needs more than a radius; it needs a length that allows the radius to be maintained through the whole travel.
That means the hose length is set by the geometry of movement, not by the distance between the two end points. A hose that is long enough only in the rest position will be pulled straight at one end of the travel and compressed at the other.
Two arrangements work. A travelling loop on a trolley that keeps the radius constant, and a counterweighted loop that takes up slack. Both keep the curve within the limit at every position.
A hose that is compressed rather than bent is also at risk, because a composite wall does not tolerate being pushed. The helix can buckle, and a buckled helix is a permanent restriction.
What Should the Specification Say?
Four lines.
The minimum radius for the bore and type. The working radius the layout will maintain, which should be larger. The loop type and its support points. And the storage coil diameter, because a hose that is coiled tighter than its radius in the store arrives damaged.
Add a fifth where the hose moves: the travel envelope, so the length can be checked against the radius at both extremes.
A specification that names the radius prevents the most common installation error on flexible lines, and it costs one line on a drawing.
How Does the Radius Change With Temperature?
A warmer hose is more flexible, and flexibility is not the same as tolerance.
At the top of its range a thermoplastic wall softens, which makes a tight bend easier to make and easier to overdo. The hose goes round the curve without complaint, and the helix deforms just the same.
At the bottom of the range the opposite happens. A cold hose is stiff, and forcing it round a radius it would take warm is how the cover cracks at the outside of the bend.
Both effects argue for the same discipline: make the bend at ambient where possible, and never use temperature as a way to achieve a radius the hose does not have.
Where Does the Radius Interact With Support?
The radius and the support are the same design problem seen from two directions.
A hose supported at close intervals holds its shape and stays inside its radius. One supported at long intervals sags, and the sag creates a radius nobody specified.
The interaction is strongest at changes of direction. A bend that is unsupported becomes the lowest point, which makes it a drain point as well as a fatigue point. A bend that is supported at both ends and at the apex keeps its radius under load.
Where a composite hose bend radius is tight and the hose is heavy, add a support rather than trusting the hose to hold itself. The wall is not structural.
How Do You Check an Existing Installation?
Four checks, all with a tape and a torch.
Mark the published radius on the floor or a wall and compare it with each bend. Measure the tightest curve, not the average. Look for wrinkles on the inside of the bend, which indicate the limit has been passed. And check for a kinked composite hose at the fittings, where the hose cannot flex and the curve is forced.
Record what you find against the route drawing. A bend that is marginal today will be worse after a year of pressure cycles.
Where a bend fails the check, the remedy is usually a longer hose or a moved support rather than a different product.
What About Accessories?
Two accessories change the radius in practice.
A bend restrictor or a spring guard holds a minimum radius at the fitting and takes the movement the hose cannot. It is the standard fix where space is short at the connection.
A support saddle, as covered in the support guide, keeps the curve where it was designed rather than letting weight pull it tighter.
Neither adds strength to the hose. Both prevent the hose from being asked for a curve it cannot give.
What Is the One Rule Worth Remembering?
The composite hose bend radius on a datasheet is a limit for occasional movement, not a target to design to.
A minimum bend radius measured on the floor is easier to hold than one assumed from a drawing, and it turns an argument into a check. In practice the composite hose bend radius and the loop length are chosen together, because one sets the other.
A hose loop design that ignores the radius will be adjusted on site, and the adjustment is usually a shorter hose pulled tighter. A kinked composite hose at a connection is the most expensive version of that mistake, because the fitting amplifies the curve.
Where the composite hose bend radius cannot be met in the space available, change the route or the bore. The minimum bend radius is a limit, and a limit that is negotiated is a hose with a shorter life.
Часто задаваемые вопросы
What is a normal bend radius for a 3 inch composite hose?
Around 300 mm for Types 1 and 2 and 350 mm for Types 3 and 4, measured to the centreline.
Can a composite hose be bent tighter than the published radius?
It can be forced, and it will take a set. The bore ovalises and the helix work-hardens, which shortens life.
Why does my hose not lie flat after use?
The helix has taken a permanent set from a tight bend or a tight storage coil, and it will not recover.
Does the radius change with pressure?
Not directly, but a pressurised hose is stiffer and less tolerant of a tight curve. Design the radius for the working condition.
How do I store a large hose?
On a coil or a rack at or above the minimum radius, never on a hook that concentrates the load.
Is the radius measured inside or to the centre?
To the centreline of the hose. Measuring to the inside gives an optimistic figure and a design that damages the hose.
Does a hose loop design change with bore?
Yes. A larger bore has a larger minimum radius, so a loop that works at 2 inch will be a kink at 6 inch. Design the loop from the bore and type, not from the space left over.
About HENGHUA
HENGHUA supplies composite hose from 1 inch to 8 inch and states the composite hose bend radius for the build ordered, including the storage coil figure. Where a route is tight, we will say so before the hose is made rather than after it is installed.
Send the route drawing or the space available, and we will confirm the bore and loop that fit inside it.



 English
 Spanish
 Portuguese
 French
 German
 Arabic
 Russian
 Indonesian
 Japanese
 Korean