
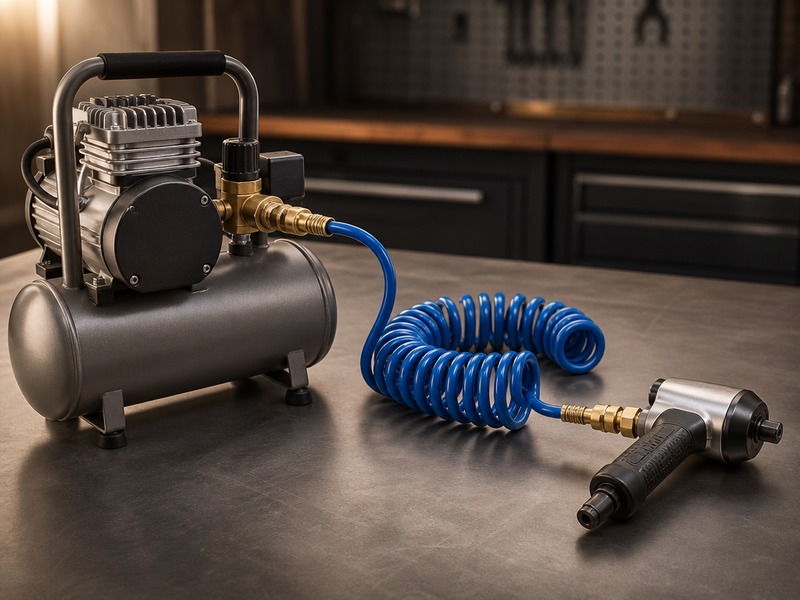
An air fitting is the metal part that joins a compressor, a hose, and a tool into one sealed line. Air fittings do not make compressed air or consume it. They carry it from one component to the next without losing pressure along the way.
This guide is for the person who has just unboxed a first compressor and found a bag of brass parts in the box. It explains the three-part chain from the compressor outlet to the tool inlet. It tours the parts you will actually touch, lists a first kit worth buying in one order, and walks through a first connection and the five faults beginners meet first.
Flow figures are our bench measurements at 100 PSI inlet and 23 °C ambient; tool demand figures are manufacturer ratings at 90 PSI. About 13 min read.
What a Pneumatic Connection Is, and Where Air Fittings Fit
A pneumatic connection is three components joined by two joints. Air leaves the compressor outlet, travels along the hose, and reaches the tool inlet. Nothing else is involved. Every part on that route exists to serve one of the two joints.
The two joints do different work, and beginners often treat them as one. The first is a fixed joint. It is assembled once and left alone for months. The second is a tool-change joint. It is opened and closed many times a day, sometimes while the line is still under pressure. A part built for one job is usually the wrong part for the other.
That difference shapes everything you buy. A fixed joint is judged on how well it seals and how long it stays sealed. A tool-change joint is judged on how cleanly it latches and releases. Buying air line fittings without separating those two jobs is the most common first mistake.
Table 1. The three links in a beginner’s compressed-air line, the joint at each link, and how often it is opened.
| Link | What sits there | Joint type | How often it opens |
|---|---|---|---|
| Compressor outlet | A threaded port, usually 1/4 in NPT on a home unit | Fixed | Almost never |
| Hose | A flexible line, 1/4 to 1/2 in bore, with a fitting at each end | Fixed at the ends, tool-change at the coupler | Ends stay sealed; the coupler opens daily |
| Tool inlet | A threaded port on the tool body | Fixed once the plug is installed | Rarely |
Table 2. Fixed joints compared with tool-change joints, and the part each one needs.
| Point of comparison | Fixed joint | Tool-change joint |
|---|---|---|
| Where it appears | Compressor outlet, tool inlet, hose end | Between hose and tool, or between two hoses |
| How it seals | Thread deformation on a taper thread, or a washer or O-ring on a parallel thread | A spring-loaded latch plus an O-ring on the plug nose |
| What fails first | Cross-threading, or a split brass port from over-tightening | A dried O-ring, or a latch that no longer holds pressure |
| Correct part | A barb, an adapter, or a port fitting | A matched plug and socket from one style family |
Pressure makes the chain worth thinking about. A typical home compressor cuts out somewhere between 120 and 150 PSI. Most air tools are rated at 90 PSI at the tool. Everything between those two numbers has to pass through your hose and your fittings.
A Plain-Language Tour of the Air Fittings You Will Touch
Four parts do almost all the work on a beginner’s line. They are the barbed hose end, the threaded port fitting, the quick connect plug and socket, and the adapter. Each has one job, and each fails in a way you can predict.
Table 3. Air fittings quick connect parts, barbed hose ends, threaded ports and adapters, with what each one does and how it fails.
| Part | What it does | What goes wrong |
|---|---|---|
| Barbed hose end | Pushes into the hose bore and grips the tube wall from the inside | The clamp is left loose, or the barb cuts the tube wall and the hose pulls off |
| Threaded port fitting | Screws into a tool, compressor, or regulator port and carries the thread standard | Cross-threaded when forced onto the wrong standard, or over-tightened until a brass port splits |
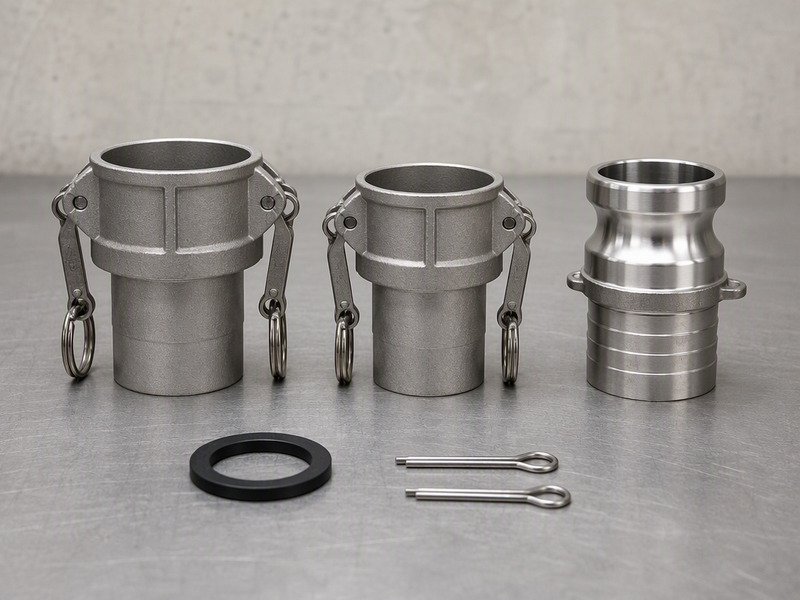
| Quick connect plug | The male half of the tool-change joint, clicked into a matching socket | A worn nose groove lets the plug release while the line is still under pressure |
| Quick connect socket | The female half, with a locking sleeve and an internal valve that closes on release | The O-ring dries out and hisses, or dirt stops the sleeve from returning |
| Adapter | Changes thread standard, gender, or size between two parts that would not otherwise meet | Forced onto the wrong thread, which damages both the adapter and the port |
A barbed hose end grips the hose wall from the inside, and a clamp or a crimped ferrule holds it there. The failure is almost always the clamp: it is tightened once, the rubber relaxes over a few weeks, and nobody checks it again.
A threaded port fitting carries the thread standard, so it decides whether two items can be joined at all. Cross-threading is the classic beginner error, and it happens when a part is forced past the point where it should have turned by hand.
A quick connect plug and socket must come from the same style family. A plug that latches but sits too deep will hold at low pressure and let go under load, which looks like a worn seal.
An adapter cures a thread mismatch; weak flow is a bore problem instead. The batch companion on quick connect coupler profiles is the reference to keep, a planned URL that must be published before this link goes live.
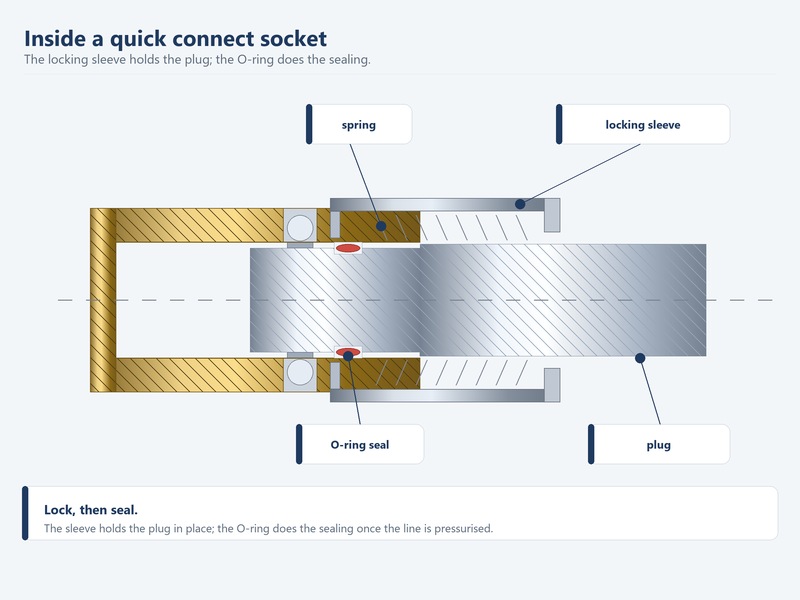
Figure 2. Inside a quick connect socket: the locking sleeve holds the plug, and the O-ring does the sealing once the line is pressurised.
Pneumatic Fittings Types and the Two Questions That Name Them
The names look complicated until you find the two questions behind them. Which end does this part serve, and what does that end have to meet? A hose end meets a tube. A port end meets a thread. Very little else is decided by the name.
Read a part label as two halves. “1/4 NPT male x 3/8 in barb” means a 1/4 in pipe thread on one end and a barb for 3/8 in hose on the other. The first half is the port end, and the second half is the hose end. Once you can split a label that way, the shelf stops being confusing.
Table 4. The questions that name almost any pneumatic fittings types label, and where the answer is written.
| Question | What it decides | Where to look |
|---|---|---|
| Which end is this? | Whether the part meets a hose or a thread | The first word of the label, or the shape of the part |
| What thread, and which standard? | Whether the part will screw into the port at all | The port label, or a thread gauge on an unmarked port |
| Does it seal on the thread or ahead of it? | Whether you need tape, a washer, or an O-ring | The thread form: taper or parallel |
Pneumatic fittings types also split by how they seal, and that matters more than shape. A taper thread seals on the threads themselves as they tighten. A parallel thread seals on a washer or an O-ring ahead of the thread, so extra tightening does more harm than good. Tape helps the first and can defeat the second.
A beginner does not need the full family list on day one. The family-by-family map, including crimped ferrules, push-to-connect parts, swivels, and bulkhead fittings, belongs on a reference page. Ours sits in the batch companion on air hose fitting types, sizes and selection, a planned URL that must be published before this link goes live. The existing air hose fittings and couplers guide covers the compatibility checks in the meantime.
Choosing an Air Compressor Fittings Kit in One Order
One order is enough to get a first tool running. The goal is a single coupler style, one thread standard, and a spare set of seals. Everything else can wait until a specific job forces your hand.
Table 5. What belongs in an air compressor fittings kit for a first home shop, and what to specify.
| Item | What to specify | Quantity | Why it is on the list |
|---|---|---|---|
| Hose | 3/8 in bore, 25 ft, rubber or hybrid | 1 | Covers most hand tools without a pressure penalty |
| Compressor socket | The coupler style you have chosen, 1/4 in NPT | 1 | Turns the compressor outlet into a tool-change joint |
| Tool plugs | Same style family as the socket | 1 per tool | Lets any tool join the line without unscrewing anything |
| Thread sealant | PTFE tape for taper threads | 1 roll | Seals the fixed joints at the compressor and the tool |
| Spare O-rings | Sized to your coupler style | 10 | The cheapest fix for the most common leak |
| Leak detector | A spray bottle of soapy water | 1 | Turns a leak test into a two-minute habit |
Size the hose before anything else. A 3/8 in bore covers most hand tools, and at 100 PSI inlet it moves roughly 80 SCFM. A 1/4 in line moves about 40 SCFM, which is plenty for a brad nailer at 0.3 to 0.5 SCFM and nowhere near enough for an impact wrench at 4 to 8 SCFM. If you are still weighing materials, how to choose an air hose sets out the trade-offs between rubber, PVC, and polyurethane.
Thread standard comes next. In North America most consumer compressors and air tools use 1/4 in NPT, so one standard covers a whole starter line. Check the tool port before ordering, because a single odd port can force an adapter you did not plan for.
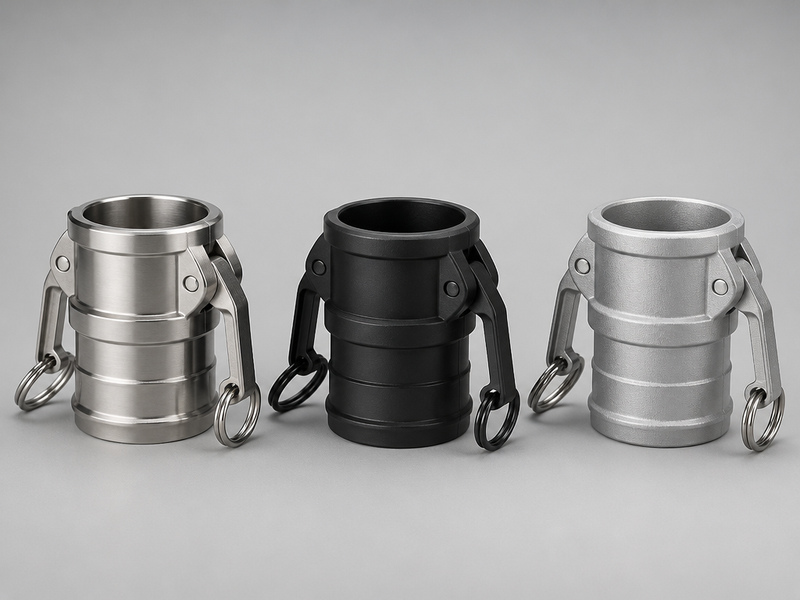
Then pick one coupler style and stay with it. The M style is the usual shop default in North America, and on our bench it flows about 40 SCFM at 1/4 in and 100 PSI. The letter follows catalogue practice, and profile interchange is a separate question from thread size. Whichever family you choose, buy a socket for the compressor and one plug for every tool. Kits sold as an air compressor fittings kit normally follow that pattern already.
Spare O-rings are the smallest line on the order and the one that saves the most time. Coupler O-rings dry out, flatten, and begin to hiss. A bag of ten costs very little and turns a failed coupling into a two-minute repair.
What You Can Postpone, and When It Becomes Useful
Beginner kits fail in two directions: too little to start, or a box of parts that will never be used. The second is more expensive than it looks, because unused stock hides the one part you actually need.
Table 6. Common first purchases that a beginner can postpone, and the point at which each one earns its place.
| Part | Why you can wait | When it becomes useful |
|---|---|---|
| Multi-size adapter set | You cannot know which sizes you need before you meet an odd port | After a specific port refuses to match |
| A second coupler style | Two styles in one shop guarantee a plug that will not latch | When you buy a tool line that cannot be changed |
| Filter and drier | Moisture matters most to spray work and delicate tools | When you start spraying or see water at the tool |
| Push-to-connect fittings | They grip plain tubing, not hose ends or pipe ports | When you build a small control or automation line |
| Swivels, elbows, bulkhead fittings | They answer layout problems that a first line does not have | When a fixed angle kinks the hose or a wall gets in the way |
| Metric adapters | Most home-shop ports are imperial | When you own equipment with a metric port |
The pattern is simple. Buy for the port you can see, then buy again when a port refuses to match.
Two items sit on the boundary. A regulator earns its place when you spray or run a tool that needs a steady low pressure, and a filter earns its place when moisture reaches the tool. The hose follows the same logic, and the basics are covered in what an air hose is and how it is built.
Connecting Your First Air Tool, Step by Step
The procedure below assumes a factory-made hose with threaded ends, a socket on the compressor outlet, and a plug on the tool. It takes about ten minutes and needs no special tools. Follow the seven steps in order:
- Switch the compressor off and release the line pressure at the drain valve or through the tool trigger.
- Thread the socket into the compressor outlet by hand. It should turn several full turns before it needs a wrench.
- Wrap PTFE tape on taper threads only, clockwise, three or four turns, and keep the first thread bare.
- Tighten taper joints to snug plus about two turns. Tighten parallel joints until the seal seats, then stop.
- Fit the plug to the tool port, following the same steps and the same tape rule.
- Reconnect the hose, then pressurise slowly and listen at every joint.
- Brush soapy water over each joint and watch for bubbles.
Tape is the step that trips people up, and it also causes many new leaks. PTFE tape belongs on taper threads, where the seal forms on the thread flanks and the tape fills the spiral gap between them. Wrap it clockwise so that tightening does not unwind it. Keep it off the first thread, because a loose strip of tape can travel into a coupler and block it.
Parallel threads are the opposite case. They seal on a washer or an O-ring ahead of the thread, so tape adds nothing and can stop the sealing face from seating. Air fittings quick connect parts are sealed by their O-ring in the same way, and no sealant belongs on a flare or face seal either.
Table 7. Thread form, how each one seals, and whether sealant or tape belongs on it.
| Thread form | How it seals | Sealant | Tightening point |
|---|---|---|---|
| Taper pipe thread, such as NPT | On the thread flanks, as the taper deforms slightly | PTFE tape, three or four turns clockwise | Snug plus about two turns |
| Parallel pipe thread, such as BSPP | On a washer or O-ring ahead of the thread | None | Until the seal seats; no extra turns |
| Flare, face seal, quick connect | Metal to metal, or on a captured O-ring | None | Hand-tight plus a small nip |
Finish with a leak test under pressure. Brush soapy water over each joint and watch for bubbles. A joint that bubbles is not sealed yet, and a joint that stays dry is done. Feel for leaks with a soapy-water brush, because a pinhole at line pressure can push air under the skin.
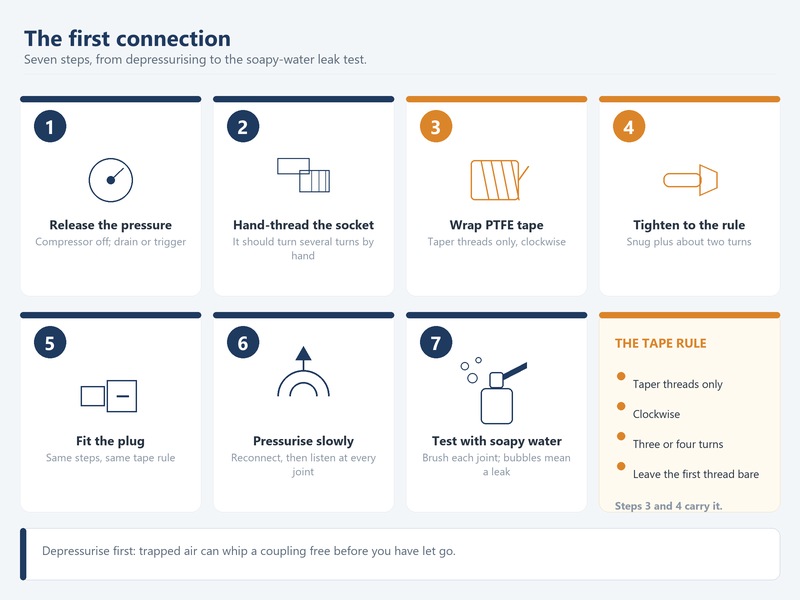
Figure 3. The first connection, from depressurising to the soapy-water leak test. Steps three and four carry the tape rule.
Troubleshooting Your First Air Fittings: Five Beginner Symptoms
Almost every first-week problem shows up as one of five symptoms. Each one points at a small set of causes, and none of them is solved by turning the compressor pressure up.
Table 8. Five beginner symptoms, the usual cause behind each one, and the fix to try first.
| Symptom | Usual cause | Fix to try first |
|---|---|---|
| The tool feels weak | Flow restriction: a narrow bore, too many adapters, or a partly blocked coupler | Check the hose bore and count the fittings in the run |
| A joint hisses | Missing or thin tape on a taper thread, or a failed O-ring on a parallel joint | Reseal the taper thread, or replace the O-ring |
| The coupler will not lock | The plug and socket come from different style families | Match the style letters on both halves |
| The plug blows off | The plug was not pushed fully home, or the nose groove is worn | Insert to the click, then replace a worn plug |
| The hose whips when released | A coupling released under pressure, with no restraint on the hose | Depressurise before disconnecting, and fit a safety clip |
A weak tool is usually a flow problem rather than a pressure problem. Check the bore of the hose, count the adapters and couplings between the regulator and the tool, and look at the coupler itself. A long run can cost more pressure than a home compressor is able to add back.
A joint that hisses is a sealing problem, and a coupler that will not lock is a matching problem. The first is fixed with tape or an O-ring. The second is fixed by buying the right part, which is why the style letter on the package matters so much. The wider procedure for tracking down a stubborn leak is set out in the air hose leak repair guide.
Safety basics before you disconnect anything
Two rules cover most of the risk. Depressurise before you disconnect anything, because trapped air can whip a coupling free and throw it. Then keep cleaning pressure at or below the 30 PSI limit set by OSHA 29 CFR 1910.242(b).
Two habits back those rules up. Inspect hose and couplers before each use, which is the subject of OSHA 29 CFR 1910.242(a). Then stay below the working pressure marked on the hose. A rubber air hose is rated 300 to 500 PSI and bursts at roughly three to four times that figure, so the hose margin is real but not unlimited. Coupler ratings are a separate number, set by the body material rather than by the hose.
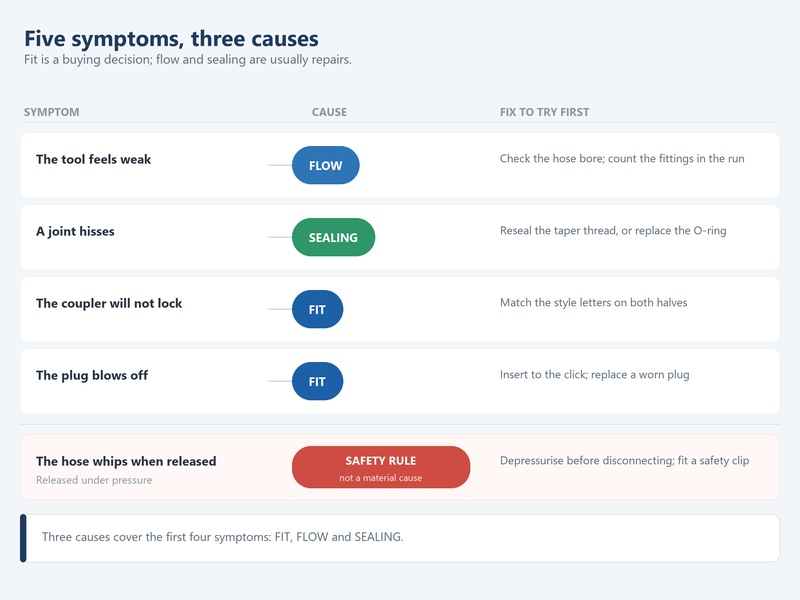
Figure 4. The five symptoms sorted into three causes: fit, flow, and sealing. Fit is a buying decision; the other two are usually repairs.
Glossary: Ten Terms a Supplier Will Use
Supplier conversations about air line fittings move quickly, and a short list of words carries most of the meaning. These ten are the ones a beginner hears first.
Table 9. Ten terms a supplier may use, and what each one means in plain language.
| Term | Plain meaning |
|---|---|
| Bore | The inside diameter of the hose, which sets how much air can flow |
| NPT | A North American taper pipe thread that seals on the threads themselves |
| BSPP | A parallel pipe thread that seals on a washer or O-ring, not on the thread |
| Male and female | Male has external threads or a protruding plug; female has internal threads or a socket |
| Barb | The ridged shank that pushes into a hose bore and grips it from inside |
| Coupler style | The letter that decides which plugs and sockets will latch together |
| Plug and socket | The two halves of a quick connect joint: the male plug and the female socket |
| Working pressure | The pressure a part is rated to carry in normal service, marked on the product |
| SCFM | Standard cubic feet per minute, the usual unit for air flow at reference conditions |
| PTFE tape | Thread sealant tape used on taper threads only, wrapped clockwise |
Two of the ten repay memorizing before you order anything. Bore sets performance, and coupler style sets compatibility. If both are right, most first-week problems never happen.
Air Fittings FAQs
What are air fittings, in simple terms?
An air fitting is the connector that joins one compressed-air component to another. It may join a hose to a compressor, a hose to a tool, or two hoses to each other. Every fitting serves either a hose end or a threaded port, and it either seals permanently or releases for a tool change.
I have one compressor and one tool: what fitting sizes does a beginner need?
Start with 3/8 in bore hose and 1/4 in NPT threads, which covers most home compressors and hand tools in North America. Choose one coupler style and buy a plug for every tool. Only step down to a 1/4 in line for a short whip hose on a light tool, and only step up to 1/2 in when a high-demand tool needs it.
Are all air fittings quick connect parts interchangeable?
Quick connect parts are sold by style family, and each family mates only within itself. Major families share a similar look, so a plug from one family can appear to fit a socket from another. The joint may hold at low pressure and separate under load. Match the style letter on both halves rather than the brand.
What is the difference between a plug and a socket?
The plug is the male half, with a shaped nose that enters the socket. The socket is the female half, with a locking sleeve that grips the plug and a valve that closes when the plug is removed. A line needs both. Plugs normally live on tools and on hose ends; sockets normally live on the compressor outlet and on the hose.
I am taping joints on a new compressor: do I need PTFE tape on every thread?
Tape belongs on taper pipe threads, where it fills the spiral gap as the joint tightens. Parallel threads seal on a washer or O-ring ahead of the thread, so tape only interferes. Flare, face-seal, and quick connect joints never take tape, because they seal on metal contact or on an O-ring.
I just unboxed a new plug: why will my coupler not lock onto the plug?
The most common reason is a mismatch between two style families, so the latch has nothing to grip. Less often, dirt is holding the locking sleeve open, or the plug nose groove is worn flat. Clean the socket first, then compare the style letters. If they differ, no amount of force will make the joint reliable.
How do I find a leak in air line fittings?
Pressurise the line, then brush soapy water around every joint, one at a time. Bubbles show the leak immediately. Start at the most recently disturbed joint, then work outward. Most leaks sit on a taper thread that needs another turn, or on a coupler O-ring that has dried out.
Can air fittings be used for water or gas?
Compressed air, water, and fuel gas use different thread standards, materials, and pressure ratings, and a part rated for shop air may be unsafe elsewhere. Air brake and fuel systems have their own specifications. Use a fitting rated for the medium it will carry, and match the thread standard on the port.
I use air to blow down parts and tools: what is the 30 PSI rule for compressed air?
It is the limit for cleaning with compressed air. OSHA 29 CFR 1910.242(b) restricts cleaning with compressed air to 30 PSI when it is directed at a person or clothing, unless the nozzle reduces pressure to that level. Above it, air can enter the skin through a small cut. Use a purpose-made safety nozzle rather than an open pipe.
Do I need an air compressor fittings kit or loose parts?
A kit is the better first purchase, because it supplies the sockets and plugs as one matching set and removes the style question. Buy loose parts afterward, once you know the specific port or size you are missing. Buying loose before that point tends to fill a drawer with parts that almost fit.
Final Verdict: Your First Week With Air Fittings
A beginner does not need a full catalogue. A first line comes together from one hose, one coupler style, a plug for each tool, a roll of tape, and a bag of spare O-rings. The skill is knowing which end of the line each part serves and whether that joint is fixed or opened daily.
Use this checklist for the first week:
- Write down the thread on the compressor outlet and on the tool inlet.
- Choose one coupler style and note the letter before ordering anything else.
- Keep tape on taper threads and off parallel, flare, and quick connect joints.
- Depressurise before every disconnect, and fit a safety clip where a hose is under load.
- Test each new joint with soapy water before you trust it.
If you would rather buy the whole starter line as one matched order, the range is listed in the industrial air hose collection, with plugs, sockets, barbs, adapters, and spare O-rings from a single source.
HENGHUA manufactures air hose fittings, quick connect couplers, air hoses, and hose assemblies for distributors, retailers, and OEM brands. Every fitting is machined from brass, zinc-plated steel, or stainless steel, then thread-checked against NPT and BSP gauges and pressure-tested before shipment. For a quote and samples, contact our team with your thread standard and the coupler style you want to standardize on.
About the author. This guide was prepared by the HENGHUA engineering and quality team, which designs and manufactures pneumatic fittings, quick connect couplers, and hose assemblies for industrial and automotive customers. The team works daily with thread gauges, flow benches, and pressure-test rigs, and writes these guides to answer the questions that arrive from first-time buyers and from distributors.
Last updated: September 2026
 English
  Spanish
  Portuguese
  French
  German
  Arabic
  Russian
  Indonesian
  Japanese
  Korean