
A steam hose leak rarely announces itself in advance. Pressure droop, a damp jacket and a faint plume at the coupling are often the only early evidence, and the same defect can scald a hand minutes later.
The page is incident-led: for burns at the coupling, containment loss from pinholes, permeation and trap-driven condensate, and unplanned downtime, it gives the cause, the warning sign, the first action and the prevention. PPE, first response and a shift-level check routine close it.
All pressures are gauge pressures at the hose outlet; saturated-steam temperatures are the saturation temperature at that pressure. About 17 min read.

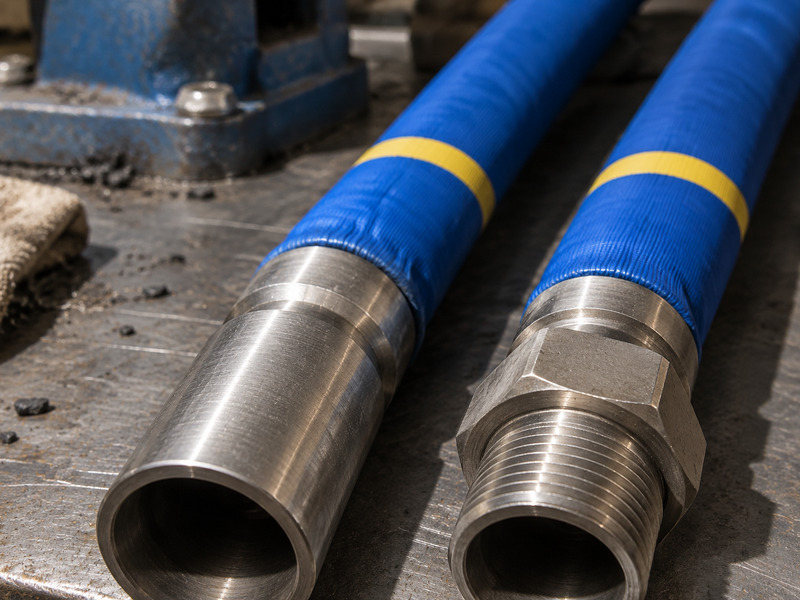
Figure 1. Coupling inspection belongs to the shift routine: restraint fitted, cover dry and clamp hardware tight.
What a Steam Hose Leak Looks Like Before It Fails
Steam rarely escapes through a clean hole into open air. Containment fails by three routes, and each route leaves a different symptom on the outside of the assembly. The first is a pinhole through the tube wall. The second is permeation, where steam crosses the tube and vents through the cover. The third is the joint, where a clamp, a ferrule or a flange has relaxed.
A trained operator can rank those three routes from the outside, with no instrument at all. That ranking decides whether the line keeps running to the next planned break or stops now.
Four observations, read together, separate a weeping cover from a failing assembly:
- A damp streak or dark band along the cover, usually longer than it is wide.
- Soft blisters that flatten as the hose cools and rise again when steam returns.
- A hiss or a visible plume at the coupling, loudest during warm-up.
- Pressure droop at the header gauge with no change in plant demand.
Table 1. Early evidence of containment loss on a steam hose and the defect it usually points to
| Evidence on the line | What it usually points to | Urgency |
|---|---|---|
| Damp streak or dark band on the cover | A pinhole through the tube wall | Remove at the next planned break |
| Soft blisters that flatten when cool | Permeated steam lifting the cover | Inspect the assembly and the trap station |
| Plume or hiss at the coupling | Clamp, ferrule or flange has relaxed | Isolate before anyone works nearby |
| Pressure droop with steady demand | A loss somewhere downstream | Isolate and find the loss now |
| Cold condensate weeping from the cover | Liquid reaching a hose rated for steam | Check the trap and the drainage first |
The perforated cover is the reason a little vapor is not always a fault: ISO 6134 specifies a pin-pricked cover so steam permeating the tube vents instead of lifting the cover into blisters. The layer anatomy and compound behavior belong to the EPDM steam hose guide.
Liquid water on a steam cover is a different signal. It usually means condensate reached a hose specified for steam duty, so the fault sits at the trap station, not in the hose. Rank the evidence before you reach for the isolation valve.
Burn Injuries at the Coupling: How They Happen
Nearly every steam hose burn at a coupling traces back to one mechanism: condensate that has collected in the line flashes to steam the moment a joint opens. Water hammer in a steam line is a condensate event, not a pressure spike. It is also the most common cause of coupling and fitting loss in the field.
The second mechanism is relaxation. Clamp hardware and crimped ferrules move under repeated thermal cycling, the joint loses preload, and a jet of saturated steam finds the gap. At 6 bar the saturation temperature is about 165 °C, and at 18 bar it reaches 210 °C. Skin is damaged in a fraction of a second at either figure.
The third mechanism is the violent one. A steam hose rupture releases the stored energy of the line at once, and anything attached at the coupling can move. That is why restraint, correct assembly and inspection are treated as one system rather than as three separate purchases.
Warning signs arrive before each one. A slightly damp coupling face, a clamp nut that takes an extra turn, a hose that shifts as pressure is applied, or a sharp crack during warm-up all justify stopping the job. None of them should be logged as something to watch next week.
Table 2. Mechanisms behind a steam hose burn at the coupling, with the sign that precedes each one
| Mechanism | What happens at the joint | Sign before it lets go |
|---|---|---|
| Water hammer | A condensate slug accelerates and shocks the connection | A bang or knock during warm-up |
| Relaxed clamp | Thermal cycling removes bolt preload | A nut that needs an extra turn |
| Creeping ferrule grip | The crimp loosens under repeated heating | A wet ring on the ferrule shoulder |
| Hose movement | The assembly pulls on the joint as pressure rises | Visible travel or a strained bend |
| Trapped condensate | Liquid is driven into the hose on start-up | Gurgling and uneven jacket temperature |
The first action after a burn does not involve the hose. Isolate the line, isolate the person, and cool the affected area with clean running water while the isolation is confirmed. Then get a medical assessment. Never pull away clothing that has adhered to a burn.
Prevention is procedural rather than heroic. Warm up slowly with drains open, verify the trap station before start-up, check clamp torque at every break, and fit restraint at the coupling. None of those steps costs a shift. Skipping them is how a steam hose burn reaches the accident book.
Why a Steam Hose Leak Starts as a Pinhole
A pinhole begins where the tube is locally distressed. The usual starting points are an internal splice, an abrasion line where the hose rests on a bracket or a floor edge, and a tight bend that traps a hot spot. Saturated steam at 165 °C to 210 °C ages any tube; a distressed point ages faster than the rest.
The failure grows from the inside. The tube wall thins at the hot spot until a fine jet escapes, and the jet then widens its own path in the cover. A pinhole jet is nearly invisible close to the surface.
Mineral staining, damp dust on the cover, or a narrow wet band that reappears in the same place after a wipe all point to a through-wall defect. Treat any of them as a containment loss.
The first action is to depressurize, drain, and tag the assembly out of service. Tape, a hose clamp or a smear of sealant is not a repair on a steam line. Keep the failed section for inspection, so the failure mode can be identified.
Prevention works on the same three points. Keep the assembly off the floor, support it at sensible intervals, stop using a hose as a sling or a lever, and never rate the assembly on temperature alone. The working pressure sets the saturated-steam temperature, and the difference between working and burst pressure is explained in the pressure rating guide.
Bends, abrasion and coupling ends are the three places to look first, and a written inspection list makes that habit repeatable. The hose inspection checklist and failure-sign procedure is a workable record for a steam hose as well as a hydraulic one.

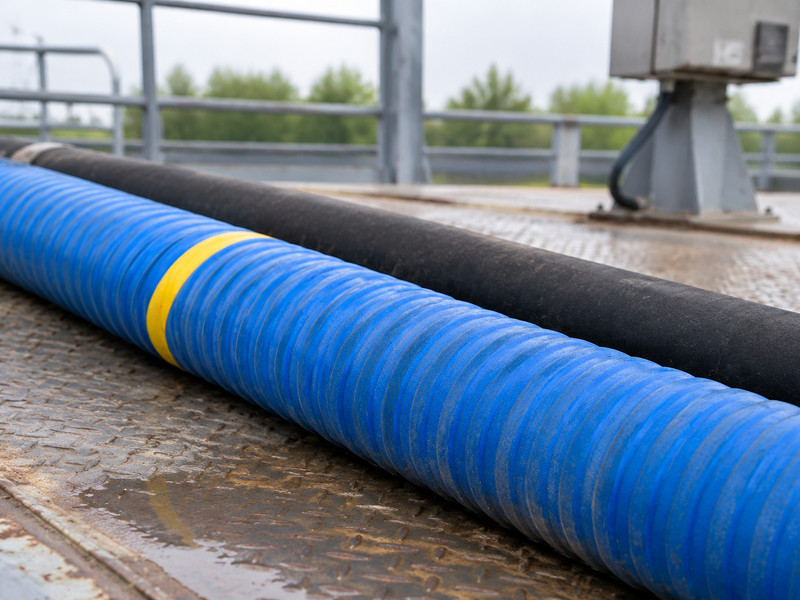
Figure 2. A damp band and a raised blister mark a pinhole, not surface condensation.
Steam Trap Failure: The Leak You Do Not See
A steam trap that has stopped working usually does not show steam where anyone is watching. It shows water where water should not be: in the hose, in the header, and in the jacket of whatever the press or chamber is heating. Wet steam heats unevenly, and the condensate it carries erodes fittings and tube walls from the inside.
Two opposite failures are both costly. A trap that fails closed holds condensate until a slug forms and water hammer damages the connection. A trap that fails open blows live steam to atmosphere and wastes the energy the plant paid for. Testing for one mode only is a common gap in trap programs.
Warning signs are cheap to collect. The trap body runs cold when a passing trace line runs warm beside it. No discharge reaches the sight glass during a blowdown, or live steam blows continuously through it. A sudden temperature drop across the trap, or knocking upstream of it, completes the picture.
The first action is a controlled manual blowdown, then a strainer check, then repair or replacement of the trap internals. Running a station permanently on bypass is not a repair; it moves the problem downstream and turns a small steam trap failure into a much larger one.
Prevention is a survey habit rather than a tool purchase. Tag every trap, record its type, test it on a fixed cycle, keep strainers clean, and verify drainage before start-up rather than after the first hammer. Site experience is consistent on one point: a steam hose leak that appears every few weeks often begins as a trap that nobody tested.
Table 3. Reading a trap station quickly, and the action each observation calls for
| Observation at the station | Likely condition | Action |
|---|---|---|
| Cold trap body on a live line | The trap has failed closed | Blowdown, then check the strainer |
| Continuous steam at the outlet | The trap has failed open | Repair or replace the internals |
| No discharge during blowdown | A blocked inlet or a blocked strainer | Clean or replace the strainer screen |
| Pulsing discharge with knocking | Condensate is reaching the hose | Isolate the hose and re-test the trap |
| Even temperature, clean discharge | The station is working | Record the result and move on |
Downtime: What One Steam Hose Failure Actually Costs
A failed hose stops production for far longer than the time needed to fit a replacement. Production is lost during cool-down, isolation and drainage, then again while a spare is located, then again during restart and rewarming. None of that time appears in the price of a hose.
The accounting usually hides two further charges. Product already in the process may need to be held, reworked or scrapped, and a restart that is too fast can crack a chamber or stress a press bladder. A rushed restart is how one failure becomes two incidents in the same week.
Unplanned steam hose downtime also competes for the same maintenance hours that the trap survey, the inspection round and the planned hose change would have used. Deferred work is deferred again, and the next failure arrives sooner.
The clearest warning sign is not on the hose at all. It is a critical station with no hot standby assembly, a store room with one hose per press, and a maintenance backlog that only clears when something stops.
The first action is to remove the cause of the wait rather than the wait itself. Keep one pre-assembled, pre-tested standby for every critical station, tagged with its size and pressure rating. Then a hose change becomes a planned task instead of a stoppage.
Table 4. Where unplanned downtime accumulates after a hose failure, and how each phase is shortened
| Phase after the failure | What it consumes | How to shorten it |
|---|---|---|
| Isolate and drain | Operator time while the line is hot | Practice the isolation sequence before the event |
| Find a spare | Production hours waiting on the store | Hold a tagged standby per critical station |
| Fit and torque | Fitter time and a second pair of hands | Pre-assemble and pre-test the standby |
| Restart and rewarm | Energy and the risk of a second failure | Warm up on a written ramp with drains open |
| Hold or rework product | Material and quality-team time | Decide the hold rule in advance |
Steam Hose Failure Modes and the Warning Sign for Each
Six modes cover most of what a steam hose actually does in service, and each one produces a warning sign before it becomes an incident. The table below is built for use at the line: cause, warning sign, first action and prevention sit in the same row.
A steam hose failure is rarely a surprise to the crew that works beside it. The damp streak, the nut that turns further, the hammer on start-up and the trap that stopped cycling are all visible in advance. What is usually missing is a rule that says what to do about them before the shift ends.
The prevention column is deliberately unglamorous. Correct pressure rating, correct assembly, a supported route and drainage cover most of the risk, and they cost nothing extra when they are bought as one package rather than fixed later. The steam hose range is built for exactly that kind of assembly, and the selection decisions that go with it are covered in safe use of steam hoses.
A steam hose rupture is the mode with the least warning and the most energy behind it. It is also the mode most affected by restraint and by handling, which is why the retention question is treated separately in hose safety cables and handling practice.
Table 5. Failure modes with cause, warning sign, first action and prevention for each
| Mode | Cause | Warning sign | First action | Prevention |
|---|---|---|---|---|
| Pinhole through the tube | Abrasion or a hot spot at a bend | A wet streak in the same place | Tag out and keep the section | Support the route and check bends |
| Cover blistering | Permeated steam with a blocked vent path | Soft blisters that rise when hot | Inspect the whole assembly | Correct class and a clean cover |
| Coupling seepage | Relaxed clamp or creeping ferrule | Damp ring at the joint | Isolate and re-make the joint | Torque checks at every break |
| Cover abrasion | Dragging over concrete or steel edges | A scuffed, flattened cover line | Re-route before the next shift | Rollers, saddles and lifting points |
| Tube hardening | Cycling above the rated envelope | A stiff hose that will not flex | Replace and review the duty | Rate on saturated-steam pressure |
| Sudden separation | Condensate hammer plus lost retention | A bang or a kick on start-up | Isolate and clear the area | Drainage plus fitted restraint |
PPE and First Response for Steam Hose Work
Personal protection on a steam line is chosen for the hazards that actually occur, not for the temperature of the pipe. Saturated steam at 165 °C will pass through a fabric glove and scald the skin underneath. A face shield protects against a jet that no goggle will stop. The requirement to provide that protection comes from 29 CFR 1910.132.
Employers also carry a broader duty. The general duty clause of the OSH Act requires a workplace free of recognized hazards, and a steam hose that is known to weep or hammer is a recognized hazard. Documenting the check, the finding and the action is what turns that duty into practice.
OSHA does not approve, list or certify hoses, safety cables or whip restraints, so “OSHA-approved cable” is a marketplace phrase, not a listing. Restraint practice comes from the manufacturer’s instructions and plant procedures.
First response follows four steps in order. Isolate the line and the person, cool the affected area with clean running water, get medical assessment, and report the event with photographs of the assembly as found. Do not conclude the cause from the signs of a steam hose leak until the failed section has been cut open and examined.
Table 6. Protective equipment for work on or near a live steam hose
| Article | Hazard addressed | Point to verify |
|---|---|---|
| Insulated gloves | Contact with hot cover and fittings | Dry, undamaged, gauntlet length |
| Face shield | A jet or flash at the coupling | Worn with safety glasses |
| Long sleeves and trousers over boots | Steam drifting along the cover | No gaps at the wrist or ankle |
| Hearing protection | Noise during blowdown | Worn during trap testing |
| Barrier or exclusion zone | Bystanders in the whip path | Marked before warm-up |
Preventing a Steam Hose Leak: A Shift-Level Program
A prevention routine only survives if it fits inside a shift handover. Six checks take a few minutes at the start and the end of a shift, and together they intercept every mode in Table 5 before it becomes an incident. Each check has one owner and one record line.
The warm-up and the shutdown are the two moments of highest risk, because both move condensate through the assembly. A deliberate drain at each one removes most of the hammer energy that damages couplings. The hose maintenance and service-life picture covers retirement rules.
Records matter more than forms. A tag that carries the size, working pressure and identification code, plus the date of the last check, turns a spare hose into a known asset. When something does fail, the record shows whether the date was missed or the duty was wrong.
Six checks, run by the shift crew, cover the routine:
- Pre-shift walk: cover dry, no blisters, no new abrasion lines, tube flexible, restraint fitted.
- Drain verification: strainers clear, traps cycling before steam is admitted.
- Slow warm-up: drains open, no hammer, no movement at the coupling.
- Joint check: clamp torque verified after the first thermal cycle.
- End of shift: shut down, drain, and record anything that changed.
- Weekly review: compare records, and plan the next hose change.
The purpose of the routine is to keep every finding on the shift that notices it. A steam hose rupture, a coupling leak or a hose that has gone stiff is resolved against a rule, not against the judgment of whoever is on duty. That is the difference between unplanned steam hose downtime and planned maintenance hours.

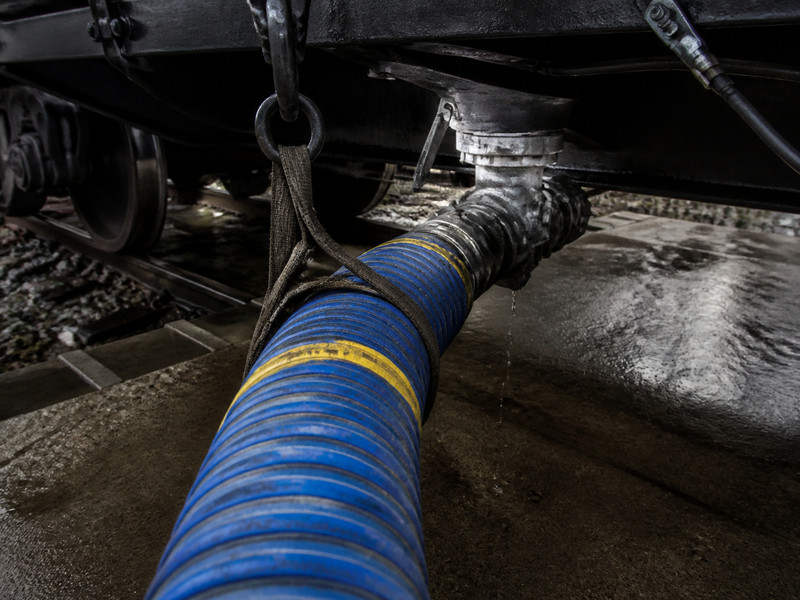
Figure 3. The joint check happens after the first thermal cycle, when clamp preload has already relaxed once.
Steam Hose Leak FAQs
How fast does a small steam leak become a real hazard?
Very fast on a live line. A fine jet of saturated steam is nearly invisible at the source, so the first clear warning is often a damp streak or a hiss rather than visible steam. Once the flow widens, the jet can reach a person before anyone has time to step back. Treat every new damp streak on a steam line as an active hazard, not as a cosmetic defect to log.
What should an operator do first when a coupling starts to weep?
Isolate first, then investigate. Close the supply, allow the line to drain, and keep everyone clear of the whip path of the assembly. Do not tighten a clamp or a ferrule on a pressurized line; preload that has been lost under load is often lost again. Once the line is cold and drained, re-make the joint to the assembly procedure and record the event.
Is a wet cover always a fault?
No. A steam hose with a perforated cover lets steam that permeates the tube vent. A few wisps of vapor or light dampness after a cold start can be normal, and it should stop once the assembly is warm. Water that runs, drips, or leaves a dark band in one fixed place is different, and that pattern points to a through-wall defect.
How do I tell whether the trap or the hose is at fault?
Test the trap before you blame the hose. If the trap body is cold on a live line, or steam blows continuously through it, the drainage is wrong and the hose is only reporting the result. A hose that hammers, runs cool at the outlet, or contains liquid when it is opened is usually downstream of a drainage problem. Fix the drainage first.
Can a pinhole be repaired on site?
No. A wrap, a clamp or a sealant applied over a steam hose is a temporary disguise, not a repair, and it hides the defect that will fail next. The tube wall has already thinned, so pressure will find the same path again. Remove the assembly from service, keep the failed section for examination, and fit a tested replacement rated for the duty.
Why do coupling injuries happen during warm-up rather than at full pressure?
Warm-up is when condensate moves. Liquid that has collected in a cold line is pushed along as soon as steam is admitted, and a slug of water striking a bend or a fitting produces a shock load far higher than the steady working pressure. Joints that would hold quietly at full pressure can be shocked open. Slow warm-up with drains open removes most of that energy.
What does a hot standby assembly actually save?
It converts a stoppage into a task. With a pre-assembled, pre-tested standby on site, the crew isolates, fits and restarts instead of waiting for a store issue or a delivery. The hours saved are production hours, and they are usually far more valuable than the cost of the spare. Hold one standby for every critical station.
Which checks belong before every shift?
A short, fixed round: cover dry, restraint fitted, no new abrasion or scuffing, clamp hardware tight, drains clear, and traps cycling before steam is admitted. Add a joint check after the first thermal cycle, then a drain and record at shutdown. The value comes from repetition and from writing the result down, not from the length of the list.
Does a safety cable prevent a scald?
It limits travel; it does not stop the steam. A cable or whip check retains a failed connection so it cannot swing freely, but the release of hot fluid still happens. Protection against a scald comes from isolation, procedure, correct assembly and personal protective equipment working together. Restraint is one layer of that set, and a useful one.
When should a hose be removed from service?
At the first confirmed containment defect, at a joint that will not hold torque, or when the tube has gone stiff and will not flex by hand. Age alone is a weak criterion, because duty, cycling and drainage decide how fast a hose is consumed. Use the record of checks to retire an assembly before it becomes the reason a line stops.
Final Verdict: Five Checks That Prevent a Steam Hose Leak
The three incidents on this page share one cause chain: condensate that was not drained, a joint that was not checked, and a defect that was seen but not actioned. Closing that chain needs no new equipment, only five checks with an owner and a record. A steam hose leak caught as a damp streak costs a wipe; the same leak caught as a coupling failure costs a shift.
Five checks, run in order, cover the whole chain:
- Verify drainage and trap operation before steam is admitted.
- Warm up slowly, with drains open and nobody in the whip path.
- Re-check clamp torque after the first thermal cycle.
- Walk the route for damp streaks, blisters and new abrasion.
- Record every finding, and retire an assembly on evidence.
Two of those checks are the ones plants skip most often, and they decide the outcome. Trap repair is deferred because nothing has visibly failed yet, and torque is re-checked rarely because the joint looks dry. Both omissions turn a small steam trap failure into a coupling event.
That is also the honest way to reduce steam hose downtime. Every finding recorded and actioned on the shift that noticed it moves an event out of the unplanned column, and over a year that timing shift outweighs any single hose change.
HENGHUA manufactures steam hoses and steam hose assemblies for distributors, EPC contractors and OEM brands. The range uses an EPDM tube with textile or steel-wire reinforcement and a perforated, oil-resistant cover.
Bore sizes and pressure ranges cover the ISO 6134 Type 1 and Type 2 envelopes, plus a high-temperature grade rated to 230 °C for duties above the saturated-steam envelope. Assemblies are terminated with bolted safety clamps, crimped or swaged ferrules, flanged ends and cam and groove couplings, in carbon steel, 304 and 316 stainless steel and brass.
Every assembly is tested hydrostatically to its rated working pressure before shipment and marked with its size, working pressure and identification code. Commercial terms include factory-direct pricing, short lead times for bulk orders, private labeling, custom packaging and OEM/ODM branding. For a quote, samples or help building a safe standby kit, contact the HENGHUA team.
About the author. This article was prepared by the HENGHUA engineering and test team, which handles steam hose assembly design, hydrostatic testing and field failure review for industrial hose customers. The team works from assembly records, test bench data and installation reviews on steam systems in tire curing, precast concrete, food processing and general plant steam service.


 English
 Spanish
 Portuguese
 French
 German
 Arabic
 Russian
 Indonesian
 Japanese
 Korean