
A six-inch composite hose full of product weighs more than most people expect, which is why a hose support saddle is not an optional accessory, and the support underneath it decides whether the hose lasts five years or fifteen months. Support is not a detail bolted on after the layout: it sets the bend radius, the drain path and the wear pattern, and it is the cheapest part of the installation to get right.
This guide covers support spacing, saddle design, hanging height, the clamps that damage a hose and the ones that do not, and the checks that catch a bad installation before the first transfer.
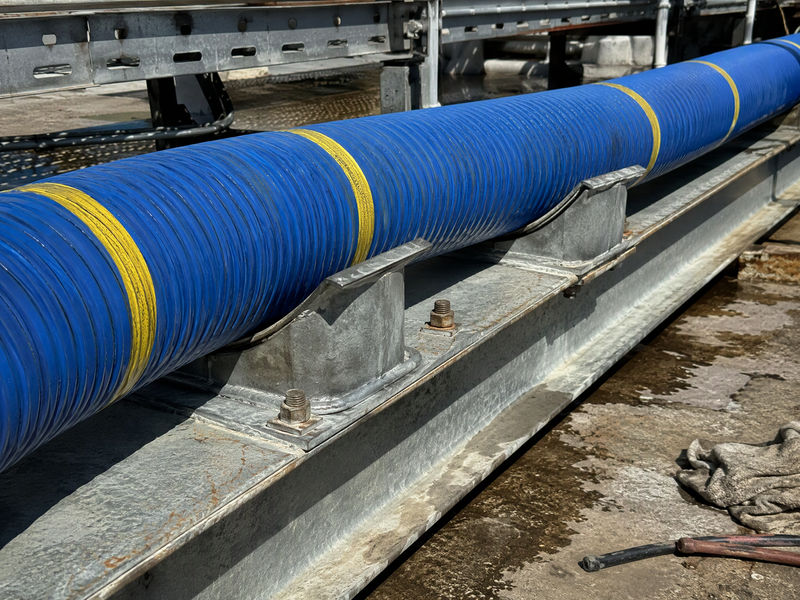
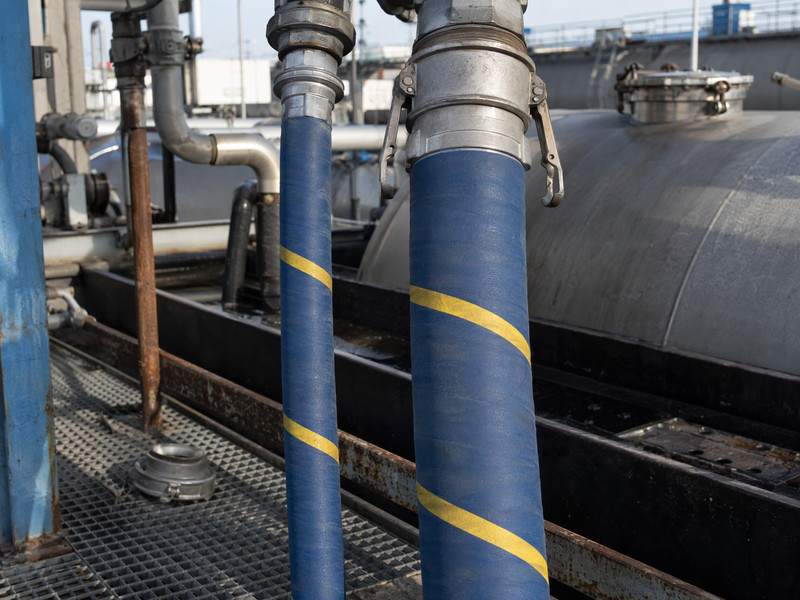
Figure 1. A large bore hose on saddles. The support carries the weight, keeps the bend radius and lets the line drain; a hose lying on the ground does none of the three.
Why Does a Large Bore Hose Need Support at All?
A large bore hose needs support because the wall is thin relative to the mass it carries, and the product adds weight at the lowest point.
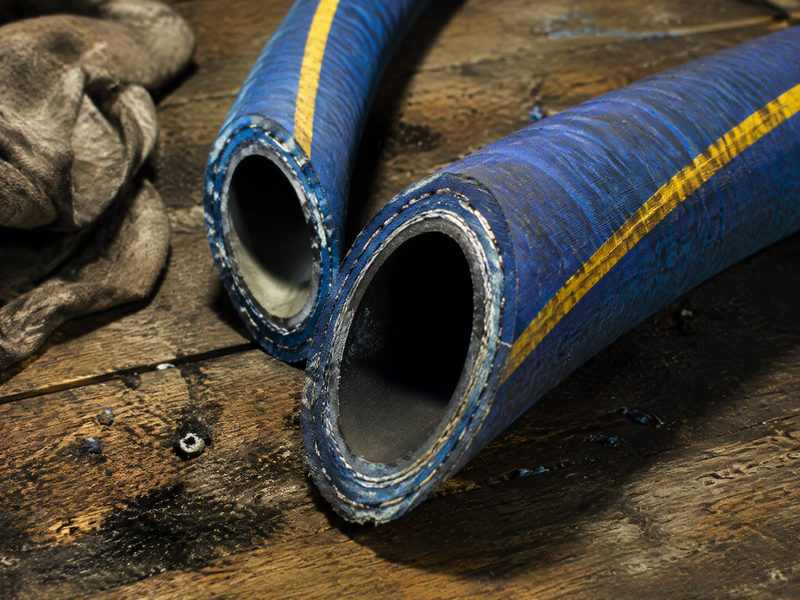
A composite wall is a film and fabric stack around a helix. It resists internal pressure well and resists a point load poorly. Left unsupported, the hose sags between connections, the sag becomes a low point that holds product, and the cover wears where it touches the structure.
The weight effect is larger than most layouts assume. Water and most chemicals are far denser than the hose itself, so a filled six-inch line is dominated by its contents. That is why a large bore hose support has to be designed for the filled condition, not the empty one.
Support also protects the helix and the film above it, and the inner wire is what fails when a sag becomes a kink. A sagging hose bends at a radius tighter than its minimum, and the wire takes the strain at every transfer.
How Far Apart Should Supports Be?
Close enough to hold the hose straight, and far enough to allow drainage. The two constraints meet somewhere around one and a half to two meters for large bore lines, and the exact figure belongs to the manufacturer and the site.
| Bore | Support spacing, indicative | السبب |
|---|---|---|
| 2 inch | 2.0 to 2.5 m | Light, tolerant of sag |
| 3 inch | 1.8 to 2.2 m | Product weight becoming dominant |
| 4 inch | 1.5 to 2.0 m | Sag affects drain |
| 6 inch | 1.2 to 1.8 m | Filled weight governs |
| 8 inch | 1.0 to 1.5 m | Needs a cradle, not a clamp |
Table 1. Indicative support spacing by bore. Treat as an engineering starting point, then confirm with the manufacturer and the filled weight.
The spacing is set by allowable sag, not by strength. A hose will not break a support, but it will bow between them, and a bow is a low point.
Where the route changes direction, add a support at the bend rather than relying on the two either side. A bend carrying weight without support is where the helix fatigues first.
What Makes a Good Saddle?
A hose support saddle should spread load over a length of hose rather than concentrate it at a point.
The useful shape is a shallow curve, wider than the hose and lined with a soft material. That distributes the weight and avoids the local deformation that a flat bar or a pipe stub creates.
Three details separate a saddle from a hazard. The radius should be larger than the hose, not equal to it. The lining should be soft enough to yield but not absorbent. And the saddle should not have sharp edges at its ends, because the hose moves slightly as it fills and empties.
A saddle that grips the hose is worse than one that simply carries it. Gripping prevents the small movement the hose needs and concentrates stress at the contact line.
Where Should the Hose Hang?
Hose hanging height is a compromise between drainage, access and mechanical protection.
High enough to drain towards a low point at the discharge end, low enough that an operator can reach the connection without a ladder, and clear of vehicles and moving equipment.
A hose that hangs with a belly in the middle drains nowhere, and a hose hanging height set by convenience usually creates one. The belly holds product, the product sits against the liner, and the liner eventually shows it. The fix is a support at the belly or a slope towards the drain point, and the second is usually cheaper.
Height also affects handling. A connection at shoulder height is made correctly; one at knee height is dragged, and dragging is how covers and fittings are damaged.

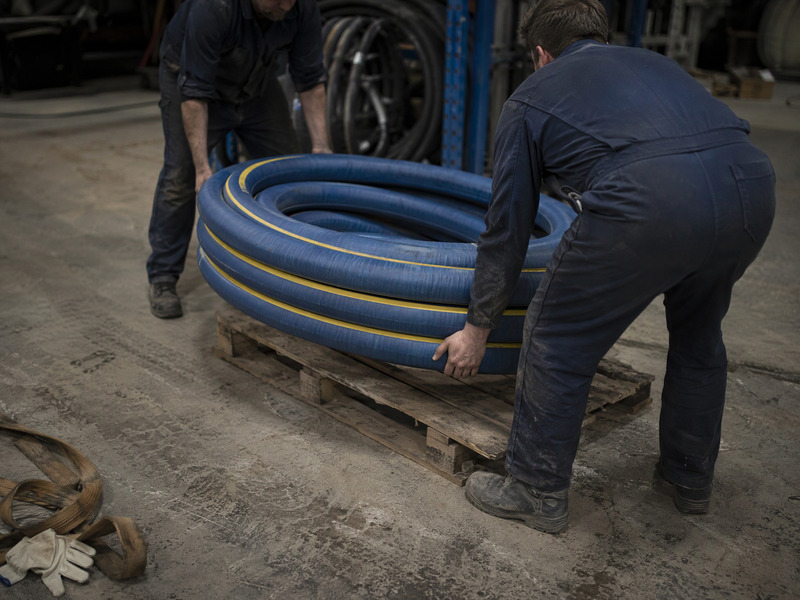
Figure 2. The liner is the working part. It spreads the load across a band of cover instead of a point, which is what separates a clamp from a crush.
Which Clamps Are Safe?
A hose clamp is safe when it holds the hose in place without crushing it, and unsafe when it is tightened until the wall deforms.
The distinction matters more on composite hose than on rubber, because the wall is thin and the helix sits close to the surface. A clamp tightened onto a helix creates a stress riser that shows up later as a pinhole.
Three rules cover most installations. Use a clamp with a wide band and a soft liner rather than a narrow metal strip. Tighten to contact plus a small amount, not to a torque figure borrowed from pipework. And never clamp at a bend, because the clamp and the bend fight each other.
Where the hose must be restrained, use a guide rather than a clamp: a loose loop that limits movement without compressing the wall. A guide is what a hose clamp becomes when it is designed for a flexible line.
What About a Moving Arm or a Travelling Hose?
Moving connections need a different approach, because the support has to follow the hose rather than hold it.
Three arrangements work. A hose hanger on a trolley that runs along a track, so the hose is carried without being gripped. A counterweighted loop that takes up slack as the arm moves. And a cable or chain support with a soft sling at the contact point.
All three share a principle: the hose is carried, not clamped, and the load is taken by the sling rather than by the wall.
The failure mode to watch is abrasion at the sling. A sling that is too tight, or a contact point that is dirty, wears the cover through in weeks and exposes the helix.
What Goes Wrong Most Often?
Five failures, and all five are visible on a walk-round.
A missing saddle at a bend, so the hose sags where it turns. A hose clamp used as a support, which crushes the wall it was meant to protect. A clamp tightened until the cover deforms. A support spacing copied from a smaller bore. And a hose resting on the ground at one end because the last support is half a meter short.
Each is cheap to fix and expensive to leave, and each is visible on a walk-round that takes ten minutes. The sag becomes a low point, the clamp becomes a pinhole, the spacing becomes a kink, and the ground contact becomes an abrasion patch.
A large bore hose support plan drawn on the layout, rather than improvised on site, prevents all five.
How Do You Check an Installation?
Five checks, all visual and all quick, and none of them needs a tool.
Walk the route and look for ground contact. Check each support for a soft liner and a wide contact patch. Confirm the drain slope runs one way, without a belly. Measure one bend radius against the bend radius table for that bore and type. And weigh or estimate the filled mass against what the weight data says the structure is carrying.
Do the walk-round with the hose filled if the process allows, because the empty hose hides every sag the layout was meant to prevent. A hose changes shape under load, and a layout that looks correct empty can sag into a kink when full.
How Do You Support a Hose That Has to Be Moved?
A hose that is connected and disconnected every shift cannot be supported the way a fixed line is. The support has to travel with it, or be close enough that the hose never rests on the ground.
Three patterns cover most sites. A hose hanger on a fixed arm, positioned at the height where the connection is made. A wall-mounted hose support saddle at the store position, so the hose drains between uses. And a simple trolley or stand that follows the hose along a bay.
The common principle is that the support should be where the hose is, not where the drawing says it is. A hose clamp on a bracket is a support only if the hose is in the bracket. A layout that assumes the hose will be returned to a hook is a layout that assumes a behaviour no crew maintains on a busy shift.
Height matters as much as position. A hose hanging height that puts the coupling at waist level is a height that gets used; one at head height gets bypassed, and a bypassed support is a hose on the floor.
A hose clamp has a place here too, but as a restraint on the stand rather than as the primary support. Clamping a hose to hold it up is how the wall gets crushed.
What Does a Support Plan Look Like?
A support plan is one drawing with four annotations, and it is worth more than a specification clause because it can be walked and checked. It is also the difference between an installation that is inspected and one that is improvised.
| Support type | Use | Avoid |
|---|---|---|
| Wide saddle | Fixed horizontal runs | Narrow contact patch |
| Lined clamp | Positioning only | Load bearing |
| Sling hanger | Vertical drops, moving arms | Tight contact |
| Cradle | 6 inch and above | Resting on a pipe stub |
Table 2. Support types by use. The “avoid” column is what a walk-round usually finds.
The four annotations are spacing, contact type, drain direction and bend radius at each change of direction. With those, an installer does not have to invent a detail, and an inspector does not have to guess one.
A large bore hose support plan should also state the filled weight per support, because that number decides whether a standard trapeze is adequate or whether a cradle is needed. Most support failures we see are not structural; they are supports chosen for the empty hose and then loaded with product.
Where the layout crosses a traffic route, add a barrier rather than a clamp. The hose needs protection from vehicles, not restraint.
Frequently Asked Questions
Do I need supports for a 3-inch hose?
Yes, at wider spacing than a 6-inch line. Product weight alone will create a sag that holds liquid.
Can I hang a composite hose from a hook?
Only with a wide, soft sling that spreads the load. A hook concentrates force on one point of a thin wall.
How tight should a hose clamp be?
Tight enough to hold position, never tight enough to deform the wall. Stop at contact and add a small amount rather than following a pipework torque.
What is the best support for a large bore line?
A cradle or a wide saddle with a soft liner, spaced so the hose stays straight and drains.
Does support spacing change with the product?
Indirectly. A denser product increases the filled weight, which increases sag at a given spacing, so heavy products need closer supports.
How often should supports be checked?
Check supports at the same interval as the hose inspection, and again after any change of product. A sag develops slowly and is easy to miss on a route walked every day, so the check belongs on that sheet rather than on a separate walk.
Can a hose rest on the ground between transfers?
Not if it is to last. Ground contact brings abrasion, contamination and a low point that holds product.
What support suits a crew with no lifting equipment?
A wide saddle at waist height, with closer spacing than the table suggests and a drain slope reachable without a ladder. Where the crew moves the hose by hand, support height decides whether the support is used at all, and anything above shoulder height gets bypassed.
About HENGHUA
HENGHUA supplies composite hose for large bore transfer and advises on support layout as part of the assembly specification, because a hose clamp or saddle chosen after delivery usually costs more than one chosen with the order.
Send the route, the bore and the product, and we will set out the support spacing, the drain slope and the bend radius the layout has to respect.

 English
 Spanish
 Portuguese
 French
 German
 Arabic
 Russian
 Indonesian
 Japanese
 Korean